How to Setup an Email Account
Creating an email account using the cPanel is a pretty straightforward process.
Step 1. Locate and Enter the Email Accounts Section
In your cPanel’s main dashboard, navigate to the Email section, or simply search for the Email Accounts tool.
Step 2. Creating an Email Account Using cPanel
- Once it’s opened, click the Create button and a new window will open.

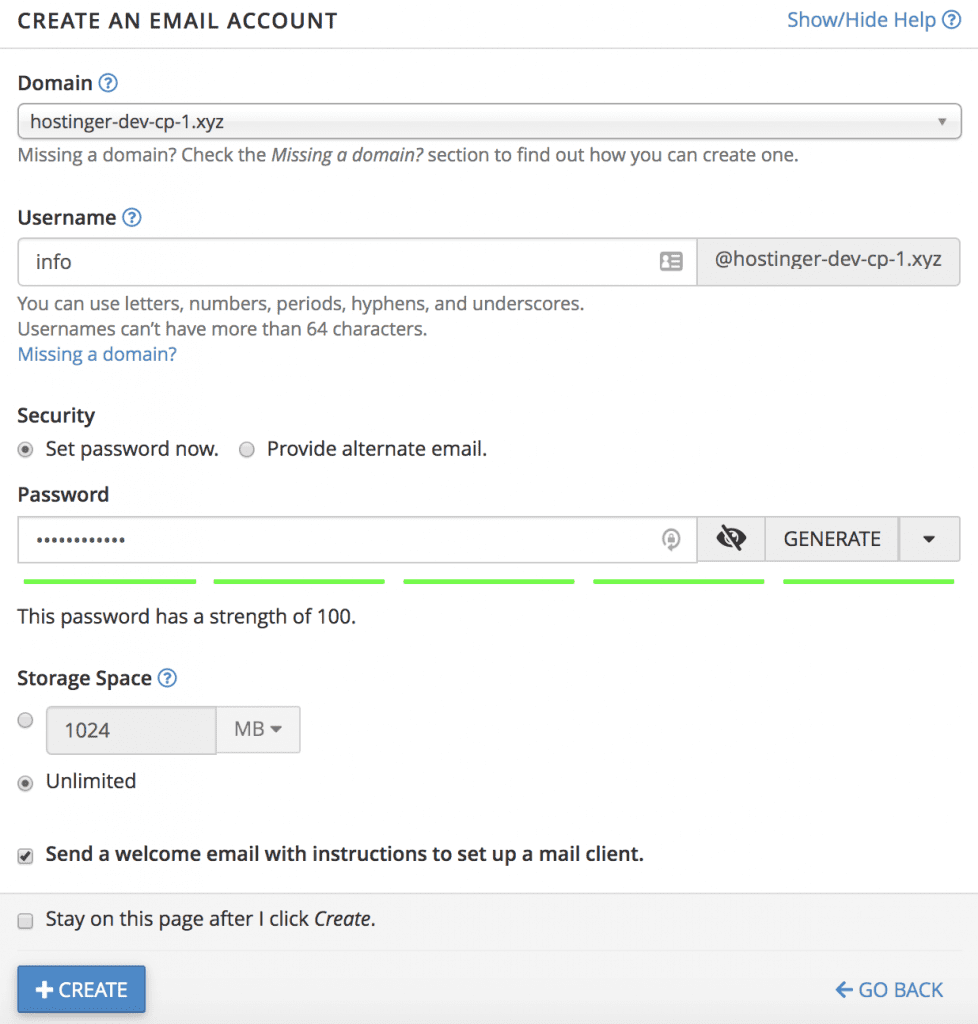
- You need to provide the details for each field:
- Username — specifies the username you want to use for the email. For example, if you wish to use info@yourdomain.com, then simply enter info in the field
- Security — requires you to input a password for the email account. Having a strong password, with a combination of uppercase letters and numbers, is highly recommended. You can use the cPanel password generator to create one
- (Optional) Provide an alternate email — if you wish to reset the email password with another email account, you can write the alternative email here
- Storage Space — provides you with two options, limited or unlimited. With limited storage, once the email reaches the set amount, you won’t be able to receive any messages. On the other hand, you shouldn’t be worried if you choose unlimited storage
Once everything is set up, click the Create button.
If you checked the Send a welcome email with instructions to set up a mail client, you’ll receive a configuration detail to set up an email client. You can then use it to set up your webmail through a client such as Mail, Microsoft Outlook, Mozilla Thunderbird, etc.
And that’s it, now you can use that email address to correspond with your audience.


